Skip to main contentSupatauri use Plunk to send emails to your user. You need to configurate your own Plunk account to send users important transactional emails like password resets or confirmation code when they create an account.
1) Create your own Plunk account
Go to useplunk.com and create a new account. 
Set up your dns
To be able to send emails, you should setup your dsn. In your Plunk account, go to “project settings” and “verified domain”. Add the dns records to via your dns suplier:
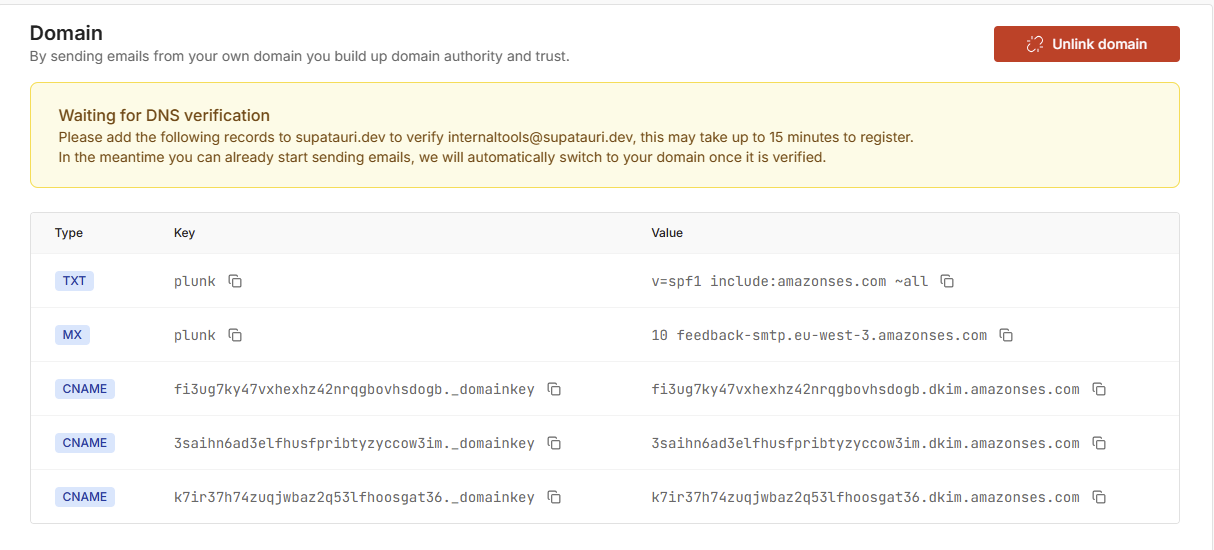 The key value is often referred as subdomain. For example here what the first DSN registration looks like with OVH interface:
 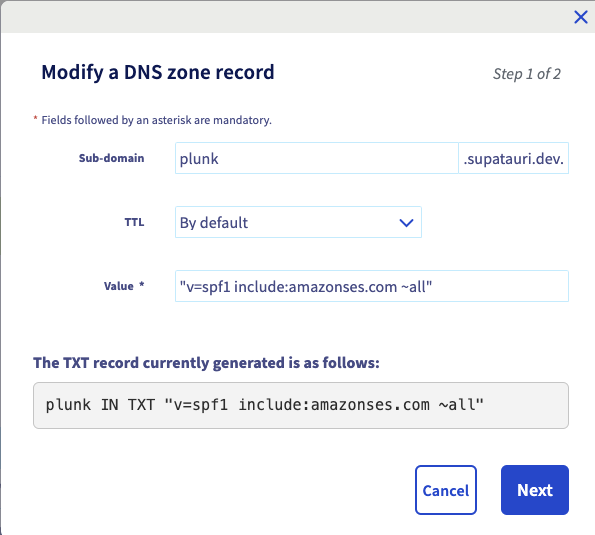 Once you have setup all your dns, you should be able to send emails via Plunk:
2) Connect plunk to your app
Your app will send events via the Plunk API to trigger sending emails. For example when a user creates a new account, you can trigger a “new user” even to send them a welcome email.
Supatauri comes with basic event already created but you will need to write the corresponding emails from your Plunk account. We will cover it later on this page.
First, you need to create an api key.
Create an API key
Go into the settings of your plunk account and create a new api key.
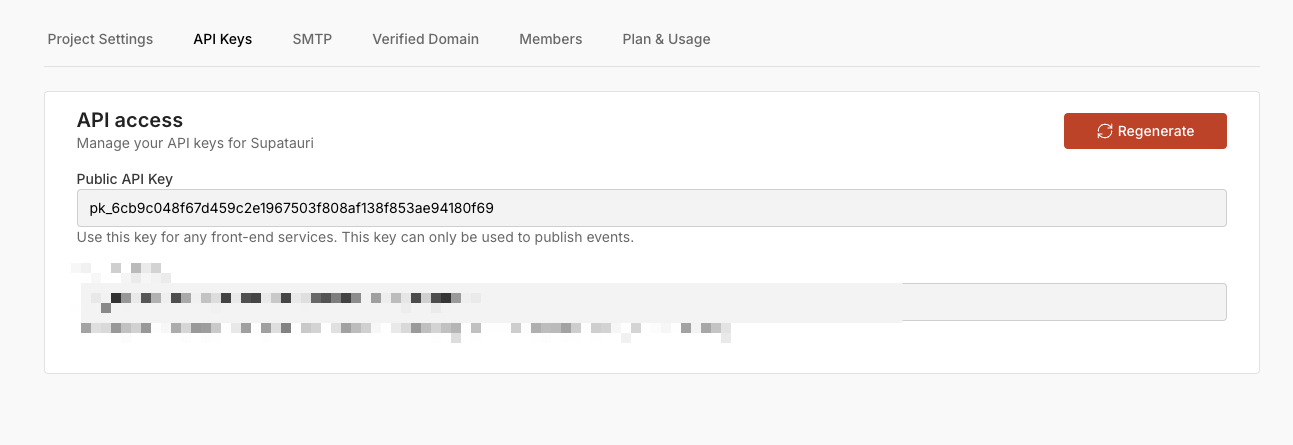 Copy it into your env.dev and env.production files at the root of your project.